


Place, fill and care for the Gardentub
Place the Gardentub on a firm surface, fill it with a hose, and cover it when you are done. No plumber, no fixed installation. The steps below are for the tub. Faucet and shower have their own short notes further down.
Table of Contents
Placement

The Gardentub should be placed on tiles, as there is a risk of the grass subsiding when placed on the grass. If the Gardentub is placed on the grass, this is at your own risk. Two people are required to move the tub.
Note:
- With water and one person the tub weighs about 450 to 500 kg. Check that the terrace can take that load.
Filling the Gardentub
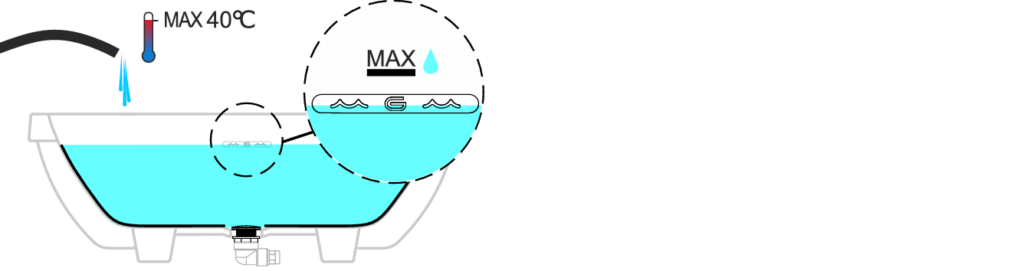
Fill the Gardentub quickly and easily with the garden hose (18 minutes), or order the tap and/or shower. If you purchase the tap and/or shower when purchasing, you can connect it to the garden hose using a Gardena coupling under the bath. If you do not purchase a tap or shower, you can also fill the bath directly with the garden hose. Max sure the water temperature does not exceed 40 degrees Celcius and the level does not exceed the Gardentub mark.
Emptying the Gardentub
The water can stay in the Gardentub for up to 4 days without filtering. There are several ways to drain the water from the Gardentub.
We at Auralis Living are working on a filtering solution so you don’t have to refill your Gardentub with fresh water. Keep an eye on our blog for availability of this solution.

Method 1:
Place a hole under the Gardentub that is equipped with direct drainage.
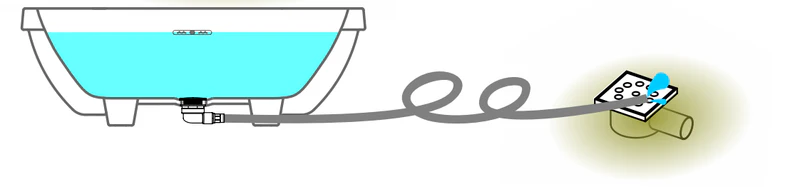
Method 2:
Connect the garden hose to the designated garden hose coupling under the Gardentub and let it run to a drain.
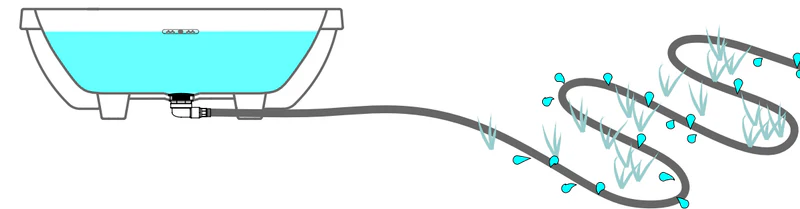
Method 3:
Connect a hose with small holes to the garden hose fitting underneath the Gardentub. This allows the collected water to be easily reused for watering the lawn or plants.
Note:
- Do not use a commercially available drip hose for this. Instead, lay your own hose (20 mm polyethylene garden hose) and drill a hole every 30 cm with a diameter of 1.5 to 2 mm. Keep in mind that the bath has a limited water volume and therefore cannot cover very large areas.
Heating options
Want to heat the water in your Gardentub so you can enjoy it all year round? Discover the differen heating options. Make sure the water temperature does not exceed 40 degrees Celcius.
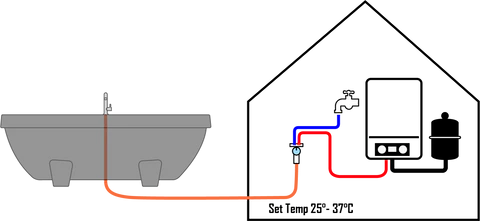
Heat your bath by connecting it to the domestic hot water circuit. Combined with a thermostatic mixing valve, the desired temperature can be set before the water flows to the tap or shower.
- Advantages: Constant heat supply; precise temperature control.
- Disadvantages: Requires preparation and installation.
- Ensure proper measures to prevent freezing.
- Installation costs to be assessed per situation.

Place a flow-through heater between your cold tap water point and your bath. A flow-through heater provides heat only when needed. Large capacities require a 3-phase connection and make sure the heater is placed frost-free, for example in the shed.
- Advantages: Efficient and energy-efficient; heats water when needed.
- Disadvantages: Requires a 3-phase connection; must be installed frost-free; in winter, the Gardentub will take a little longer to fill up.
- Relatively low purchase cost +/- €550.

If you want to fill your tub frequently and quickly and if you cannot connect it to the hot tap water circuit, you can install an electric boiler; a 100-litre boiler at 80 degrees provides enough to fill a Gardentub to a pleasant temperature in a short time. Again, place a thermostatic mixing valve between these so that the water flows out of your Gardentub tap or shower at the desired temperature. Do you have solar panels? You can use a smart app to keep the water in the boiler at temperature at times when you have energy to spare. This also ensures low energy bills.
- Advantages: Fast filling with the desired temperature; reasonably easy to install.
- Disadvantages: Uses power all year round if you don’t switch it off in winter.
- Purchase cost from €1.000.
Of course, you can consider other installations, such as solar water heaters or heat exchangers, but before that, ask your installer to assess your own situation. The best heating option for your Gardentub can be different for everyone and depends on several factors, such as the location of the Gardentub, budget, and your personal preference for sustainability and energy efficiency.
Whether you choose the simplicity of a garden hose or the efficiency of a solar water heater, a properly heated Gardentub will ensure many relaxing moments in your garden.
Maintenance & cleaning
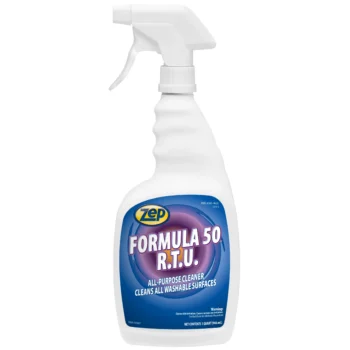
To maintain and clean your Gardentub, we recommend using a synthetic cleaner, such as Zepp 50 RTU, which is also suitable for garden furniture. Simply clean the inside and outside of the tub with a soft sponge and water, use the cleaner to remove stubborn dirt and then rinse thoroughly with clean water. This will help to keep your Gardentub in top condition and extend its lifespan.
Avoid abrasives or harsh chemicals to prevent surface damage.
Installation documentation
Installation of the Gardentub faucet – High Quality video
Notes:
- if you plan to install both a faucet and shower, you first have to install the faucet!
- if the set includes a faucet, the cover needs the faucet cutout. Without a faucet, use the cover without a cutout.
Installation of the Gardentub faucet – Low Quality video
Notes:
- if you plan to install both a faucet and shower, you first have to install the faucet!
- if the set includes a faucet, the cover needs the faucet cutout. Without a faucet, use the cover without a cutout.
Installation of the Gardentub shower – High Quality video
Note:
- if you plan to install both a faucet and shower, you first have to install the faucet!
Installation of the Gardentub shower – Low Quality video
Note:
- if you plan to install both a faucet and shower, you first have to install the faucet!
Video of applying the Gardentub cover
Video of removing the Gardentub cover
Installation manual for Gardentub, faucet, shower & cover
Notes:
- Every product comes with a hardcopy installation manual.
- This manual is only available in English.
- If you have questions, you are always welcome to ask our support by Whatsapp, mail or telephone.
- The manual makes extensive use of language-independent images.
Tools required for installation
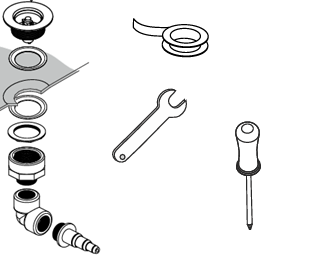
With the tub: the drain, a coupling for a Gardena garden hose, and a sponge for cleaning.
You supply the tools for the drain: a water-pump pliers, a screwdriver and Teflon tape.

With the faucet: an Allen key, a 32 mm hole saw, and the fittings for a Gardena hose.
You also supply the drill for the faucet hole. A cordless drill or a standard drill both work. Drill on the marking in the tub.
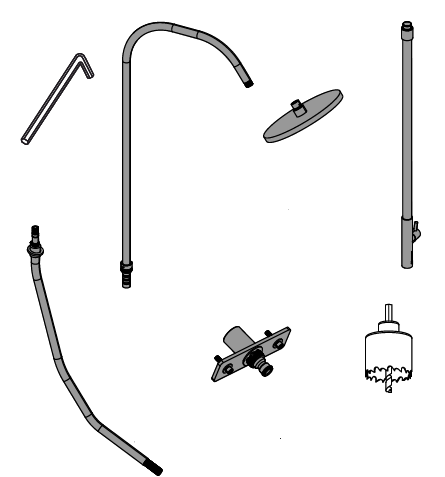
With the shower: an Allen key, a 32 mm hole saw, and the fittings for a Gardena hose.
You also supply the drill for the shower hole. A cordless drill or a standard drill both work. Drill on the marking in the tub.
